Uploading Photographs
How to Load Photos
Have your photos ready in folders with max 1,000 photos per folder (note they should be loaded without a watermark as we add one automatically)
Log onto the Photographer portal at https://www.bossfotos.com/photographer/map
Click on the blue “Create New Gallery” button.
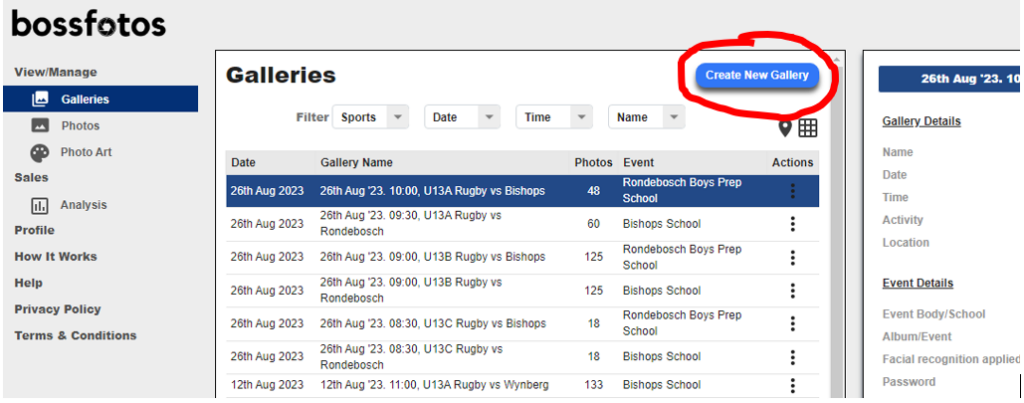
Move sequentially through each line in the right hand block starting with the gallery Name, Date etc. Please note the following:
- Location – to set this click on the map and ensure you are sufficiently zoomed in
- Publish – the default is to leave this checked. You may wish to uncheck it if you are loading many galleries and don’t want to make them “live” until the loading of ALL galleries is finished (remember to go back and click on each gallery and from the 3 dots select “publish” from the dropdown once they are all loaded
- Event/School – use the Event you have asked Bossfotos to set up (this is done by emailing info@bossfotos.com with the following information
- Event Name (eg True Grit)
- Event URL (eg www.bossfotos.com/truegrit)
- Album name if applicable –(eg www.bossfotos.com/truegrit/NSW2023
- Event logo – please send this as a jpg in a separate email with no text in the body of the email
- Album/Event – use the album that was created (if relevant)
- Event logo – only click this if the logo is to be added to low resi photos
- Facial Recognition – click this for all event photos
- Commission split – add in a percentage IF bossfotos has booked the event for you and given you a number to input, otherwise leave blank and Bossfotos just receives its standard commission of 10%
- Password – only use this if appropriate (eg a school play) and don’t forget to give the password to the appropriate audience
- Pricing Details – As directed. Only tick “low res” and a price IF low res photos are going to be sold (or potentially given away if you make the price $0)
Once all steps in the sequence have been completed, click on “Create Gallery” at the bottom right. It takes a few seconds to begin and then you will be able to see how many of the total have already loaded.
Total loading time will depend on your photo, size, computer speed and your ISP provider. Around 1000 photos in 10 minutes is typical. In the rare event that you have an ISP outage and your loading gets “stuck” (eg 67/142 loaded) and you see no progress, then hit cancel and logout and log back in. Highlight the relevant gallery and click on the 3 buttons to the right and click “edit gallery”, select and at the bottom click “add photos to gallery” again and then hit Create Gallery again and reload all 1,000 again (don’t worry, it will not reload duplicates).
Once a gallery is loaded you will be able to see the photos (with “thumbnails” in three columns). You can then go to view the photos at www.bossfotos.com as if you were a customer and ensure that everything looks ok.
If you want to pass the gallery URL onto someone you get this by clicking on the 3 dots and you will see “copy gallery URL” available in the dropdown.
A “lead photo” for the gallery will be randomly selected. You can change this by clicking on “view photos” and clicking on the star icon of the appropriate photo.
Adding photos to an existing gallery
You can edit an exiting gallery and add photos to it. In the “view galleries” menu item click on the three dots under the “actions” column and select “Edit Gallery” or ” Add Photos”. The gallery will open up in the right hand pane and you can edit the details and upload more photos. Then click on “update gallery”

How many photos to load
There is no limit, and it is always good to load all your photos in one go so that you do not need to ever revisit the “session” or event. Some people will buy every single photo of themselves.
Photo size
“Pictures of Individuals” We recommend uploading photos that are 3,000 pixels on the long edge which usually generates about a 5mb file.
Event Photos – we recommend loading photos that are around 2000-2,250 pixels on the long end which generates a file that is 2-3mb. DO NOT load files bigger than 5mb.